Adding an additional mailbox to your Outlook 2010 profile is very simple as long as you know where to look. I’ve covered the process for Outlook 2007 and Outlook 2013 but since Microsoft moved things around with Outlook 2010, I figured I would cover the step-by-step again using Outlook 2010 screenshots.
How-To Add a Mailbox to Outlook 2010
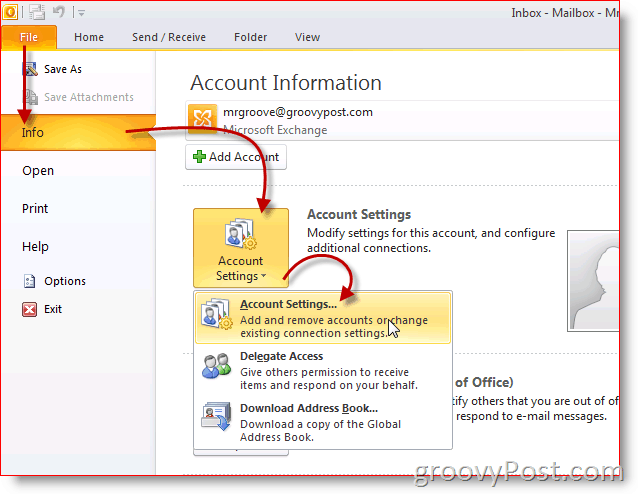
1. Open Outlook 2010 and Click File, Info, Account Settings
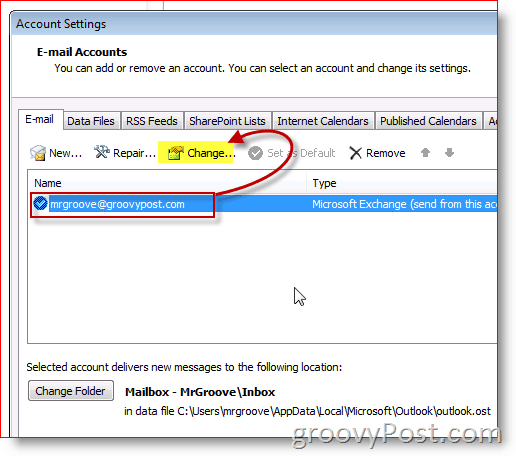
2. Highlight the account and Click Change
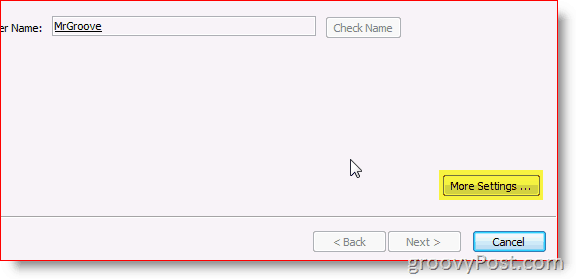
3. Click More Settings
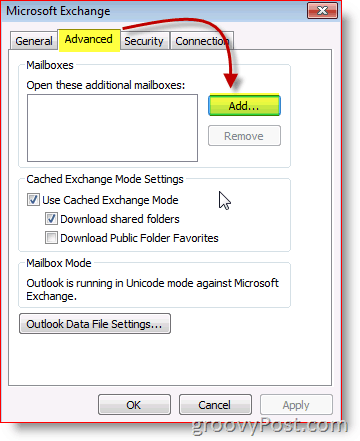
4. Click Advanced Tab then Click Add
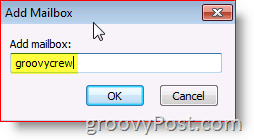
5. Type in the name of additional / secondary mailbox and Click OK
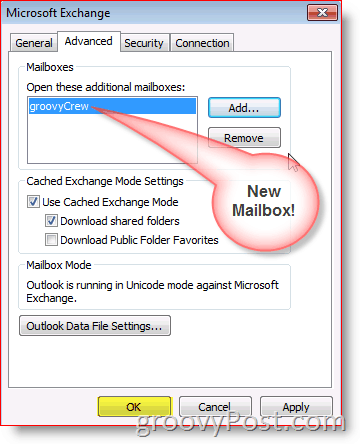
6. Verify the new mailbox is listed. Click OK to save
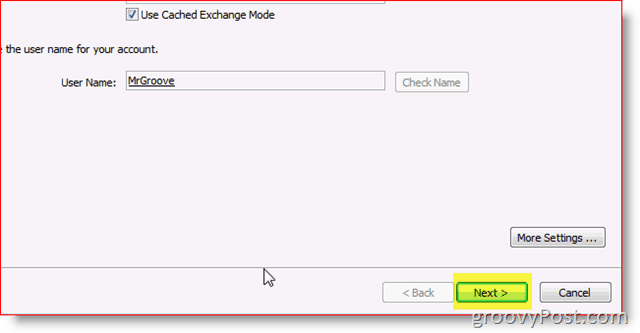
7. Click Next
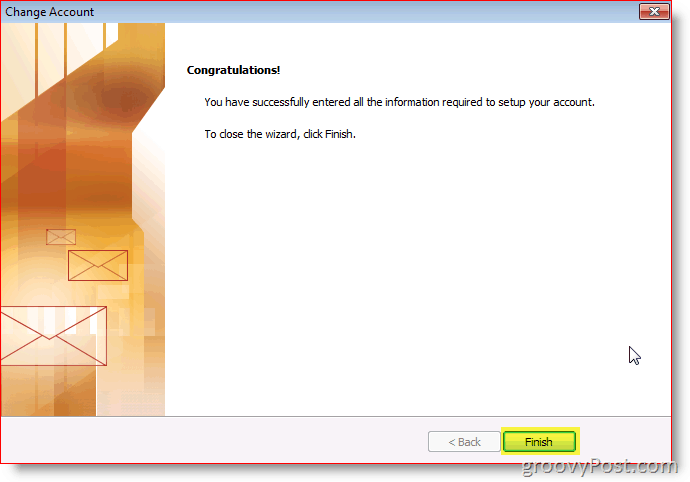
8. Click Finish
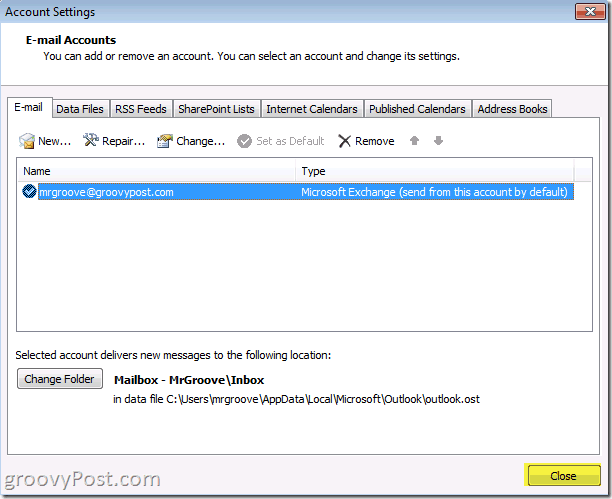
9. Click Close
Done! Your new Mailbox should now be listed below your primary account

